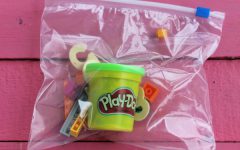
Archive for the ‘preschool activity bags’ Category:
G is for Gift
Please read the information about Read to Me & ABC here
Read to Me

The book of the week for Letter G is Ask Mr. Bear by Marjorie Flack. Don’t miss out on emphasizing the G words in this book- goose, goat, galloped.
Alphabet Art- Gift Wrap G

Supplies
G Pattern
wrapping paper scraps cut into squares and rectangles
glue

Just stick and smile!

You could also make a green or gold glitter G!
Lessons & Lapbook
Simon mastered his letters and sounds a few months ago, so we are no longer making the letter lapbooks. We will simply stick the letter art pages in his ABC binder to fill in the gaps.
However, if we were making a lapbook, we would use the Ask Mr. Bear templates as well as some of the G mini-books. Ask Mr. Bear is on the list for one of Simon’s co-op classes this fall, so I’m sure we’ll do the lapbook then.
Let’s Make a Memory ~ G is for Gift Wrap Match!

This is from a Preschool Activity Bag swap. Basically, you just make pairs of matching cards from wrapping paper scraps and clear contact paper. Turn them over and play memory!
Let’s Make a Memory ~ G Gift!
I decided to give Simon a gift that started with the a G for some extra fun this week. He was very excited to receive an unexpected gift.

What’s in the package? GARDEN GLOVES!

Book Basket
The Golden Goose by Uri Shlevitz
The Three Billy Goats Gruff by Paul Galdone
Goodnight Moon by Margaret Wise Brown
Goodnight, Gorilla by Peggy Ratham
Shopping List
~glue
~wrapping paper (if you don’t have any)
~contact paper (if you don’t have a laminator)
~G gift (I purchased garden gloves. Other ideas: grape gum or groovy glasses.)
Preschool Activity Bags in a Snap!
Did you know there are some preschool bag ideas at Homeschool Share? Check out the Workboxables Page under Preschool to find these four ideas that can easily be stored in gallon sized ziploc bags.
1. Number Wheel
Match the numbered clothespins to the corresponding circle sections.


2. Animal Match Grid

Note: I added magnets to the backs of each animal and have Simon put his main board on a cookie sheet. It helps keep things from sliding around and getting messed up so easily.
3. ABC Fishing
Use the fishing pole to pick up a fish and find it’s home on the board.

4. Homemade Stickers

Make the stickers according to the Homeschool Share directions. Add some crayons and paper to a ziploc bag and stick the stickers in. Your preschooler with have fun coloring and sticking!


If the preschooler ain’t happy…ain’t nobody happy. Keep them busy and save your sanity with preschool activity bags!
Noodle Necklaces
I keep thinking of more AND more preschool activity bags. I might do another week’s worth of them for you, but tonight I am just adding this one idea that goes with letter N (so that I can get Letter N posted!).
A simple thing for your preschooler to do is to string some pasta and make a bracelet or necklace. BUT…who wants to string plain pasta? Not me. I want it to be pretty or at least have a little pizazz. I saw some colored pasta at Hobby Lobby, but the price was not right. I knew I could do it at home for cheaper. A quick Google search landed me on this site, and I decided to go for the gold.
Supplies Needed

~Rubbing Alcohol
~Food Coloring (I had some cheap and some not-so-cheap; used both)
~Ziploc quart storage bags (one per color)
~assorted pasta for stringing (I just used what I had handy, but you could pick from any of these: wheels, salad macaroni, penne, rigatoni, macaroni, or anything with holes!
~paper towel
~cookie sheets
~tablespoon
Directions
1. Put some food coloring (10 drops -or as much as you want) in a bag with 1 tablespoon of alcohol. Add 1/3-1/2 box of pasta. Squish.

2. Repeat for different colors/different pastas.

3. Get some cookie sheets ready by lining them with paper towel. Squish bags again.
4. Throw away leftover pasta boxes and put food coloring, etc. away.
5. Dump pasta on to the prepared cookie sheets. Let it dry. Completely. before letting your tot touch it.

A few notes from me to you. I wasn’t impressed with purple; it was even WILTON purple, but it’s just dark and ugly. Darker colors (note the blue) do not do as well. The orange was perfect (also Wilton) and the green was very nice (cheapy). You may wonder why I dyed yellow pasta yellow. Well, it really does make a difference (again, Wilton…lemon yellow); it makes it bright & fun! If I ever remember, I am going to browse the Wilton selection in the cake decorating supplies to see what other lighter colors they have. I am out of red, but we really need to add some red to our collection, so I will at some point.
Once you have your colored pasta (and it’s REALLY dry), you can throw it in a gallon freezer ziploc with some string, yarn, fun-tipped yarn, or pipe cleaners, and your preschooler can pattern and bead all the live long day. Yippee for Preschool Activity Bags!
Simon really loves his noodle necklace (that he made!)

I like mine, too.

Shades of Color
Friday is here and so is your fifth installment for preschool activity bags.
Supplies Needed:
~paint chip cards- the ladder kind are the best size for this (you will need cards for pink, orange, green, blue, and yellow; you will need FIVE different shades for each). If you choose the ladder kind of cards, you will only need 5-10 cards.
~magnet strips (optional)
~color graph printed on cardstock (laminate for durability, if desired)
~gallon sized Ziploc bag
Print the graph. Cut it out so it will easily slide into your Ziploc bag. Cut paint chips down to size so they will fit on the graph. Laminate the chips, if desired. Add small magnet pieces to the backs of the chips, if you like. I do this so that my son can place the graph on a cookie sheet and then add the chips. They "stick" which makes it a little bit more fun (and less frustrating) for my son.
Put everything (25 paint chips and graph) in your Ziploc bag and attach label with packing tape.
This activity introduces simple graphing skills as well as visual discrimination skills. It also helps your little student understand that one color comes in a variety of shades. An older student could even put the chips in order based on gradation (from the lightest shade to the darkest).
Measure It!

I wanted a preschool activity bag that focused on size discrimination and pre-measuring skills, so this is the result of my brainstorm session!
Supplies Needed:
~pipe cleaner, ribbon, rick rack, lace, popsicle sticks, leather cord, dental floss, plastic cord, yarn, embroidery floss, etc. (just find whatever fibers you have on hand and use them…if you want to buy something a little fun Hobby Lobby frequently puts their printed ribbon on sale for 2/$1).
~three rulers and three sorting mats (printed on cardstock or on paper and laminated)
~gallon sized Ziploc bag
Print the file and cut the six pieces out (laminate, if desired).
Cut 6-8 pieces of string (or whatever material you are using) 7 inches long.
Cut 6-8 pieces 5 inches long.
Cut 6-8 pieces 3 inches long.
Place everything in your Ziploc bag and attach label with packing tape.

To use this activity–
Show your student how to measure each item.

Once he determines how long it is (as long as the shark, dog, or caterpillar), he then should set the piece on the corresponding mat. He should continue measuring and sorting until all the pieces are on the mats. Have fun!

Spooning Beads
This activity is a super simple idea for working on fine motor skills. Your preschooler simply transfers beads from one bowl to another using a spoon.

Many of you with preschoolers might already do something like this…but you probably don’t have it in a bag. I like having it in the bag, ready to grab & go — no hunting or searching for beads or bowls or spoons!

Supplies Needed
~beads or beans (I like using beads for this because they are more appealing to the eyes)
~two shallow bowls and one spoon (I found these adorable ice cream dishes at the Dollar Tree — 3 bowls and 3 spoons for $1!)
~Ziploc bag to store everything
~a small container or small ziploc for the beads, if desired

Simon sat and worked seriously until every bead was in the yellow bowl.

I’m thinking this exercise will help with his cooking skills and give him more control when measuring ingredients.
Five Fabulous Frogs
Here is another preschool activity bag idea for you! Tomorrow I will be sharing two- Spooning Beads & Measure It!
Supplies Needed:
~Number Mats printed on cardstock or printed on paper and laminated
~15 plastic frogs (I purchased mine at Wal-mart; Oriental Trading also has plastic frogs in BULK if you are doing a swap)
~gallon sized Ziploc bag
1. Print the frog number mats and laminate, if desired.
2. Cut out label and use packing tape to secure it to the front of your bag.
3. Place the 15 frogs and the number mats in the bag!

I always sit with Simon the first time he does any of the bags. I told him to put 1 frog on the first mat, 2 frogs on the second mat, 3 frogs on the third mat, etc. This goal of this activity is to teach number quantities. This is a huge favorite…because of those squishy plastic frogs!
Double Trouble Shapes

Supplies Needed:
~foam shapes (I found a large bucket at Wal-mart for about $5)
~tacky glue (I like Aleene’s…her glues are great)
~Shape Matching Grids printed on cardstock
~laminator (optional)
~jewelry bags (optional)
~gallon sized Ziploc bag

1. Decide how many grids you want to use. Print and laminate, if desired. (I chose three grids).
2. You need to choose 4 large shapes and 4 small shapes AND find duplicates of those shapes for EACH grid. Since I used 3 grids, I needed 48 shapes total. The duplicate shapes should be identical (same size, same color).
3. Make your shapes by gluing a small shape on top of a large one. Glue the stacked shape to the TOP of the grid (you need four sets for each grid). Set the duplicate pair aside (do NOT mount the small shape to the large shape on the spare pair).
4. This is optional, but I put the dupliate shapes (8 per bag) into small jewelry bags. This made the activity much easier for Simon. I gave him one jewelry bag of shapes and one grid at a time. Later, when he needs more of a challenge, I will let all the shapes loose in the big ziploc bag.
5. Put all the items in a gallon size ziploc bag. Use packing tape over the label to secure it to the bag.

I named this one Double Trouble because it requires some serious discrimination skills. Simon had to first determine which shape was on the bottom…then he had to FIND it and place it. He repeated the process for the top shape. He told me at one point, "Mom, this is too hard." But it wasn’t. At the end he wanted MORE (of course) and was very proud to see that he completed all three grids.

Tomorrow I will share another Preschool Activity Bag- Five Fabulous Frogs!
It’s in the bag!

Have you heard of Preschool Activity Bags? LLC has two books packed full of ideas for activities for your preschooler and each one fits (you guessed it!) in a large ziploc bag. The books also give detailed information on how to have a swap. I’ve known about these books for a long time, but they seemed overwhelming for me to tackle on my own.
In June I had the opportunity to participate in a swap (with homeschool friends online) and then I decided to coordinate a local swap. Both swaps are finished; we are all stocked up and ready for a new school year.
I love the bags! Simon loves the bags, too!

Benefits:
~Everything you need is already put together. Since we use workboxes, I just dump the bag in the workbox and we are good to go!
~The bags are cheap to make ($1-$2 each).
~Many of the activities are versatile which keeps them from getting stale.
~The bags give Simon a sense of pride and he is satisfied (he feels that he has done his "school time" when he has completed a few bags).
~You can take the bags with you anywhere! We used a few in the doctor’s office as a sanity-saver.
Bottomline: All I have to do is grab a few bags and I have a happy, busy preschooler…I couldn’t ask for much more!

I like the bags so much that I created some of my own. I will be sharing one each day for the next five days starting tomorrow with Double Trouble Shapes.
.jpg)

